Categories
Laravel Samuel

Setting up SparkPost On Laravel 5.6 Project

These are just shorthand notes from setting up SparkPost on a Laravel 5.6 project:

1.) Open up gitbash at the project root and run:

composer require guzzlehttp/guzzle

**If you get the error code below:

file could not be downloaded: allow_url_fopen must be enabled in php.ini (http:// wrapper is disabled in the server configuration by allow_url_fopen=0

**Then SSH into the server and run the command below to fix that:

php -d allow_url_fopen=1 /opt/cpanel/composer/bin/composer update

2.) Open config/mail.php and make sure the driver line is set to

'driver' => env('MAIL_DRIVER', 'log'),

3.) Verify that the following code is in config/services.php

'sparkpost' => [
'secret' => env('SPARKPOST_SECRET'),
],

4.) Add the following two lines to your .env file and upload:

MAIL_DRIVER=sparkpost
SPARKPOST_SECRET=secret-key-goes-here

Troubleshooting:

After completing the steps above are you getting the error message:
"Connection could not be established with host smtp.mailtrap.io [Connection refused #111]"

Then these steps will fix that error message:

1.) After uploading the new .env file clear the cache by running:

php artisan config:clear and php artisan cache:clear

2.) Get rid of any default mail settings in your .ENV file

Categories
Laravel Samuel

Notes on installing Laravel Site

Installing the site:

Deployment Script: Create a folder called “deploy” above the public_html directory. Update the URL paths inside our deploy script to use the URL paths of your local machine then chmod +x the script after uploading it.

Deploy Keys:

To allow the server to connect to the bitbucket repo we need to get our servers public key and add it to bitbucket, to do this we can run (cd ~/.ssh). Then run (cat id_rsa.pub) and copy the pub key file (control + insert + c to copy from terminal). If no public key file is present run (ssh-keygen) then copy the file. Next we will copy the key into Bitbucket, maximize the SSH terminal window if getting invalid key warning from bitbucket, spacing effects this. Next step is login to bitbucket, hit the settings page, then hit access keys > add key > past key into this window and save.

Manually Clone:

Navigate to one level above the public_html folder and create a new folder called (git). Inside this folder run: git clone repo-name (pull repo from bitbucket SSH repo clone)

*Please note, check to see if the repo name matches the project name inside the deploy script. These must match for the deploy script to work.

Run Composer:

If composer has been installed on the server already, you can navigate to the project root and run: (composer install). This will pull in all of the project dependencies and store them in the vendor folder.

Create Database:

Create an empty database and then add the credentials into the .enf file located in the projects root

Update .ENV File:

The ENV file is not version controlled and is unique to each host its on. This file has defaults for the URL, Database Connection, Spark Post Email Connection, & Google Maps Key.

Create Backup Scripts + CronJobs

  • backups -> daily/weekly/monthly folders
  • backupscripts -> daily/weekly/monthly scripts
  • cpanel -> crong jobs -> daily/weekly/monthly timing with the command pointed at each separate script

Commands to run once all files are present:

1.) Navigate to the deploy script and run it (./deploy-script). The first time this script runs it will create backup folders on the server along with a db connection file.

2.) After the deploy script runs, from the project root you will want to manually run: (php artisan migrate & php artisan db:seed). This will add all the database tables and default user information to the site.

Create Symlink:

The actual Laravel files live above the public_html folder for added security. For this to work we will need to create a symlink from public_html to the public Laravl Folder.

***Please note: If you are planning to have the site use a Let’s Encrypt SSL you will need to copy the .well-known folder into the Laravel Public folder. Before doing this you must add the following lines to the gitignore file:

/public/.well-known
/public/.htaccess

To Create the symlink run:

ln -s /home/user/git/repo-name/public /home/user/public_html

or if you want to go with the shorthand you can use:

ln -s ~/git/repo-name/public ~/public_html

*Please note you will need to change the file paths above to match your actual file paths
Categories
Samuel Traveling

Family Vacation

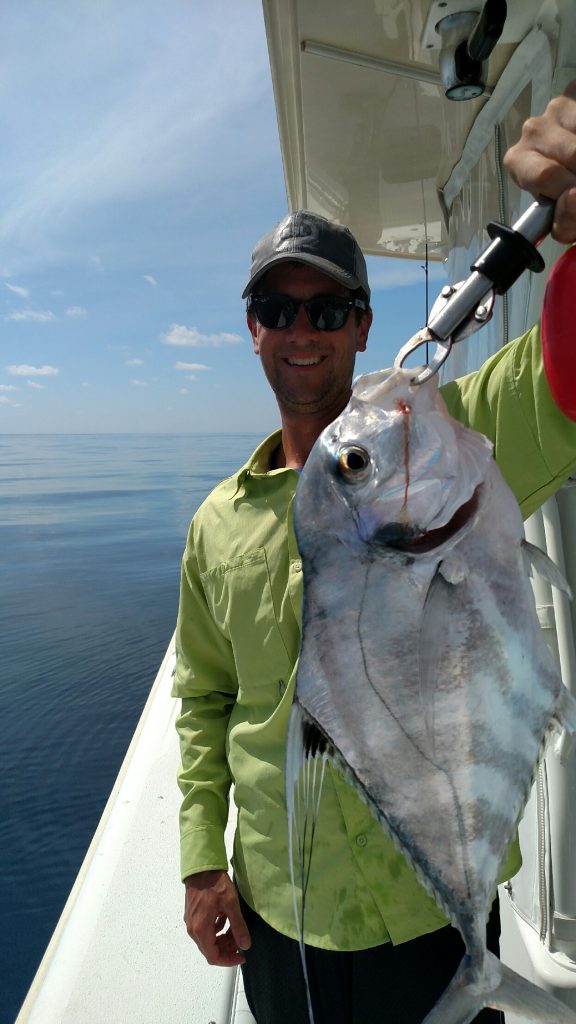
We just left our family vacation. The whole family (including Steve, Mal and all the kids + Ellen’s Parents and Sister came). This was the first time everyone took a trip together and the trip as a whole turned out to be so much fun. We went to Marco Island and stayed near some of Ellen’s parents friends. We basically just relaxed at the beach every day, and unlike most vacations where I’m ready to be back home by the last couple days I really felt like I could have stayed a lot longer. I didn’t take many pictures from the trip but I did snap one picture deep sea fishing:

Categories
Fixing Stuff Laravel Samuel

FIxing Laravel Query

We had a query that was breaking several pages after a client removed information that was referenced from another table (even thought the system explicitly warns them from removing this info lol). To fix the errors messages the client was receiving we needed to update our controller so that our database lookup only included items with vehicles present. To do this we made the following changes in two files:

Changes to our Inquiries Controller:
Step 1:
Replacing our DB lookup:
Old Query: $inquiries = Inquiry::all();

New Query: $inquiries = Inquiry::whereHas('vehicle_id')->get();

Step 2:
Fixing error message: Illuminate\Database\Eloquent\Builder::whereHas() must be an instance of Closure, none given'

Instead of using whereHas we were able to fix the error message by simply using has. This was a simple error in hindsight, we don’t need to query to lookup multiple items, we only need to know if the inquiry HAS a vehicle associated with it.

Our Final working fix: $inquiries = Inquiry::has('package.vehicle')->get();

Changes to our separate view files:
We also had issues related to inquiries on 4 other pages. The system references inquiries on part types as well and these pages all referenced an individual view file, so instead of refactoring this code into a controller we took the path of least resistance and made the changes below:

Original code:
@foreach($inquiries as $inquiry)
package; ?>
vehicle; ?>

{!! link_to_route('inquiries.show', $inquiry->id, ['id' => $inquiry->id]) !!} {!! link_to_route('vehicles.show', $vehicle->display(), ['id' => $vehicle->id]) !!} {!! link_to_route('packages.show', $package->display(), ['id' => $package->id]) !!} {{ $inquiry->getType()->name }} {{ $inquiry->getEngine()->name }} {{ $inquiry->getDriveTrain()->short_name }} {{ $inquiry->getMarking()->name }} {!! Helper::sortDollarAmount($inquiry->getPrice()) !!} {{ $inquiry->name }} {{ $inquiry->agency }} {{ $inquiry->email }} {{ $inquiry->displayPhone() }} {!! link_to_route('inquiries.excel', 'Excel', ['id' => $inquiry->id], ['class' => 'success']) !!}
 / {!! Form::deleteModelLink('Inquiry', $inquiry->id, 'inquiries') !!}

@endforeach

Changed Code:
@foreach($inquiries as $inquiry)
package; ?>
vehicle; ?>

@if($vehicle)

{!! link_to_route('inquiries.show', $inquiry->id, ['id' => $inquiry->id]) !!} {!! link_to_route('vehicles.show', $vehicle->display(), ['id' => $vehicle->id]) !!} {!! link_to_route('packages.show', $package->display(), ['id' => $package->id]) !!} {{ $inquiry->getType()->name }} {{ $inquiry->getEngine()->name }} {{ $inquiry->getDriveTrain()->short_name }} {{ $inquiry->getMarking()->name }} {!! Helper::sortDollarAmount($inquiry->getPrice()) !!} {{ $inquiry->name }} {{ $inquiry->agency }} {{ $inquiry->email }} {{ $inquiry->displayPhone() }} {!! link_to_route('inquiries.excel', 'Excel', ['id' => $inquiry->id], ['class' => 'success']) !!}
 / {!! Form::deleteModelLink('Inquiry', $inquiry->id, 'inquiries') !!}

@endif
@endforeach

Categories
Finance Samuel

Thanking Triple M

This post is about saying thanks to Pete. I wanted to float the idea of doing something on a recurring basis to thank Pete for creating his website. I love the concept that “we are the sum of the 5 people we spend the most time around”. By writing his blog Pete has allowed us to be around him virtually and soak up so many amazing, life altering principals. For that I’m extremely grateful to Pete. Trying to think of the best way to say thanks I’m reminded of another great quote “give me a big enough lever and I can move the world”. With that in mind it seems like the best gift we could give Pete is the power to amplify the leverage of his website. I’d love if other people would weigh in with hopefully bigger and better ideas but my brainstorm on this has surfaced the following idea:

The best way to increase the visibility and usefulness of the MMM site is to improve the forum. The forum scales, whereas Pete is one human, the forum is a collective of people and ideas, capable of generating amazing content at scale. If the forum was able to automatically bubble up the best content, and display it to users this would maximize the usefulness of the MMM site. Due to the nature of the current forum with repeat posts and hard to navigate threads we end up with a never ending train of advice for each subject which is not as beneficial as the best advice bubbled up to the surface by a voting algorithm (think stack overflow but for the FI world). If we could take all the content currently on the forum and put it inside of a stack overflow type system where the best answers are eventually bubbled to the top via user ratings, then the forum would potentially benefit countless more people, and Pete’s secrete mission would be 1 step closer to fruition https://www.mrmoneymustache.com/2013/02/16/weekend-edition-why-are-you-writing-this-blog-anyway/

Categories
Samuel Voluntary Discomfort

4th Voluntary Discomfort

For this months discomfort Ellen and I have decided on a “low information diet”. This is slightly different for both of us. For me this will mean that I can’t read any news websites, and I can’t check on any stock market investments for 30 days. For Ellen this will mean she is going to delete her Facebook/Instagram and Twitter accounts. Since I technically don’t have any of these accounts I felt like it was too easy for me to simply say that I wouldn’t do any social media haha

I’m really excited about this challenge because its one that I have been wanting to try for a long time. I’ve also been really excited about Ellen trying this out because I really believe that I’m much happier since I quit all social media ~2 years ago, so I’m really interested to see if she gains any of the same benefits that I feel during this 30 day hiatus.