Categories
Alternative Energy Fixing Stuff Samuel

Installing A Nest Thermostat

I recently purchased a Nest Thermostat, I’ve gotten tons of questions from friends and family about it so figured I would write a blog post on it and direct anyone with questions here:

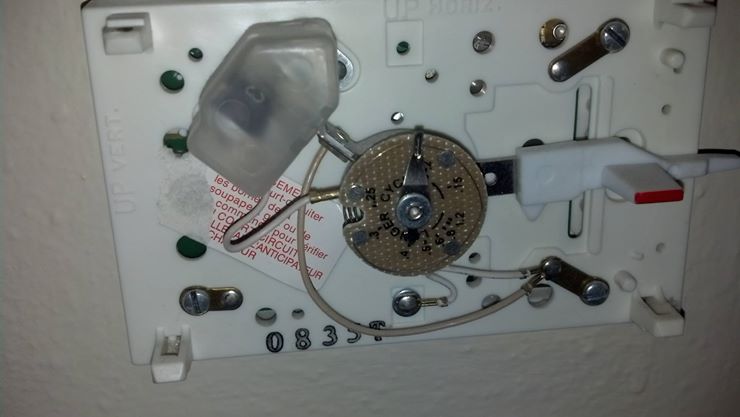
Step 1: Turn off the power to your furnace and thermostat, then decide if your system will work with a nest? Any low voltage system works with a nest, according to their website they say that is ~95% of all home systems. A real easy way to check is to pull off the cover plate on your thermostat, and check the back. If it says less than 95 volts you are good to go (for reference mine was installed in 1982, and was listed as 25 Volts). A quick picture of what removing the cover plate looks like is below:

Cover plate removed, there is actually still 1 cover plate over the "internal" housing
Cover plate removed, there is actually still 1 cover plate over the “internal” housing

Step 2: After you have determined that your system will work with nest, its time to buy and install one. This is very straightforward, and they come with solid directions. The first one I installed took about 25 minutes, the second one took about 10. To start with you have to fully remove the cover plate on the wall (not just the cover plate from step 1 above, there is actually a second plate that needs to be removed) See picture below:

Second cover plate removed, wiring exposed. To complete your Nest install you will have to remove this 3rd cover plate as well

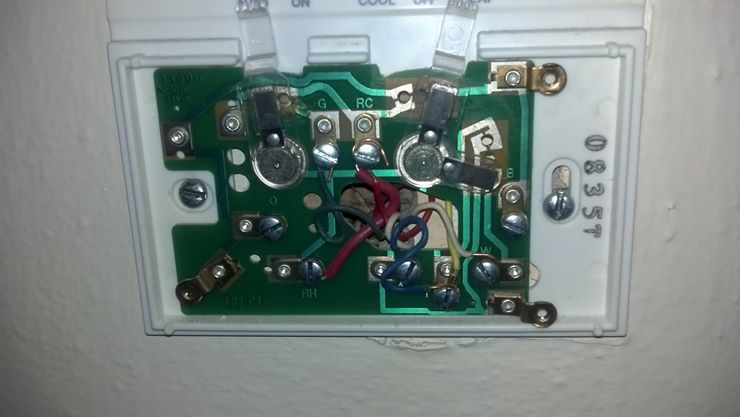
A couple notes from this picture:
-You will have an extra “jumper” wire or 2 that don’t hook to anything once you install the nest, that’s fine these are no longer needed
-You will have a big hole where your old thermostat was, dont worry Nest provides a plate to cover up this hole
-Once you unhook the wires from the plate, and unscrew it make sure to hold onto them as you remove the old cover so wiring does not fall back into the wall
-If you are the one installing the nest, make sure to download the app onto your phone so you can exert unilateral control of the thermostat from wherever you are!

The Final Result and Cost Savings
-First full month with Nest installed my heating bill was 113.21, My previous months heating bill was 157.23.
-Second full month my bill stayed pretty constant at 110.51 (both of those are great savings!)
-As its starting to heat up and the AC is needed, I’ve saving a ton of money by not cooling the house much during the day.

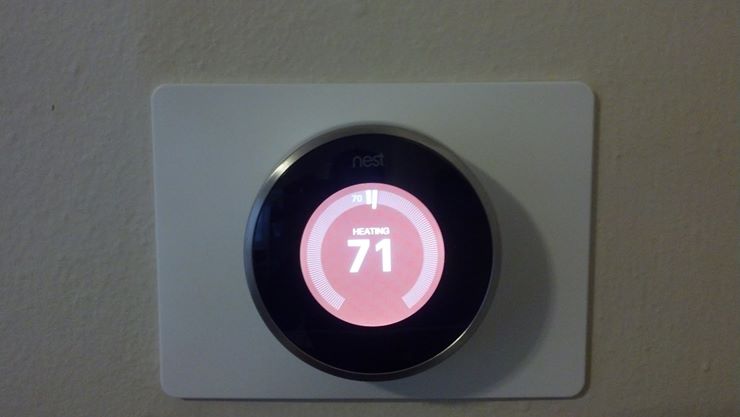
Final install photo:
1602188_10102026463263330_928663476_o

Miscellaneous notes:
I’ve found after installing and living with the Nest for several months that is its well made product, and it is really promoting me to be more energy conscious. It gives me the “leaf” scores, and almost gameifies energy savings a bit. I’ve found myself not using the AC much during the day, and then just opening the windows at night to cool the house down… I spend a lot of time in the basement anyway so its has been surprisingly easy for me. In conclusion if you are on the fence about getting a nest, Do it! And if you have an old “dumb” thermostat you will save enough money to pay the nest off in a year or two so its more than worth it “financially”

Categories
Alternative Energy Technology

Palm Springs Wind Mill Farm

This past weekend I went to the Palm Springs Wind Mill Farm with my Father and older sister….. it was amazing!

In general I love alternative energy more than the average bear. More accurately I’ve been obsessed with learning all that I can about how solar panels and wind mills work since as long as I can remember. At some point in my life I plan on owning large scale wind generators and possibly a large scale solar power plant (provided that I can figure out how to build a more efficient solar panel).

One thing that gets lost on most people (me included) is just how large these wind mills are:

view from about 100 feet away

As you can see from the image above these turbines are massive. Each blade weighs 8 metric tons (a metric tone is 240 pounds heaver than our version). With such a big blade they are able to turn an astonishingly large gear (average gear box weighs 45,000 pounds). Turning such a large gear allows the turbines to generate impressive amounts of power. The turbines at Palm Springs are some of the largest in the world, and currently the major limiting factor to their size is actually our interstate system. Our turbins have outgrown our interstate system, all of the parts must be small enough to be shipped under an overpass which limits them to under 14 feet 3 inches. There are plans to build even larger turbines at offshoar facilities like the the cap cod wind mill farm

Some Stats about the Palm Springs Farm and wind power in general:

-there are over 2,800 mills in operation at palm springs farm, with an average 98% up time. That stat is a little confusing though, it just means that the turbines are in service 98% of the time, not that they are generating power 98% of the time. In fact the wind is blowing hard enough for the turbines to generate power only 38% of the time.
-the new generation wind turbines can generate enough power to run 900 average house holds
-the obama administration commited the us to a goal of generating 20% of our nations power from wind by 2030 (a great goal that I think should be made even more ambitions)
-1 service technician services on average 10 wind mills per month (think there will be some job grown in this sector?? currently we generate less than 2% of our power from wind, upping this to 20% will create several hundred thousand jobs in this sector)
-1 wind mill can generate more power than 500 typical solar panels
-the largest GE turbines at palm springs cost 6 million dollars to build and assemble