This post is a step by step guide for fixing a samsung fridge that is leaking water. In my case water was leaking down into the crisper at the bottom of the fridge. To Fix This Issue we will be removing the evaporator cover from the fridge and cleaning out the water tray…. don’t worry if you have limited experience with refrigerator repair, I had none before attempting this as was able to complete this fix relatively easy.
– – – Update 3/8/2021 – – –
My good friend Ol’Brute was using this page to make this same repair on his Samsung fridge and he took it a step farther, finding an item you can buy that will permanently fix the manufacturing defect with the fridge so that it won’t ice up again in the future. You can still go through the steps below to fix the iced up fridge, however while you are doing that you can also install this piece and prevent any future freezing: https://www.amazon.com/SAMSUNG-DRAIN-EVAPORATOR-REFOEM-Original/dp/B008KFG9NO
Step 1:
Unplug the fridge then empty all of the contents out, and take out all of the drawers.
Step 2:
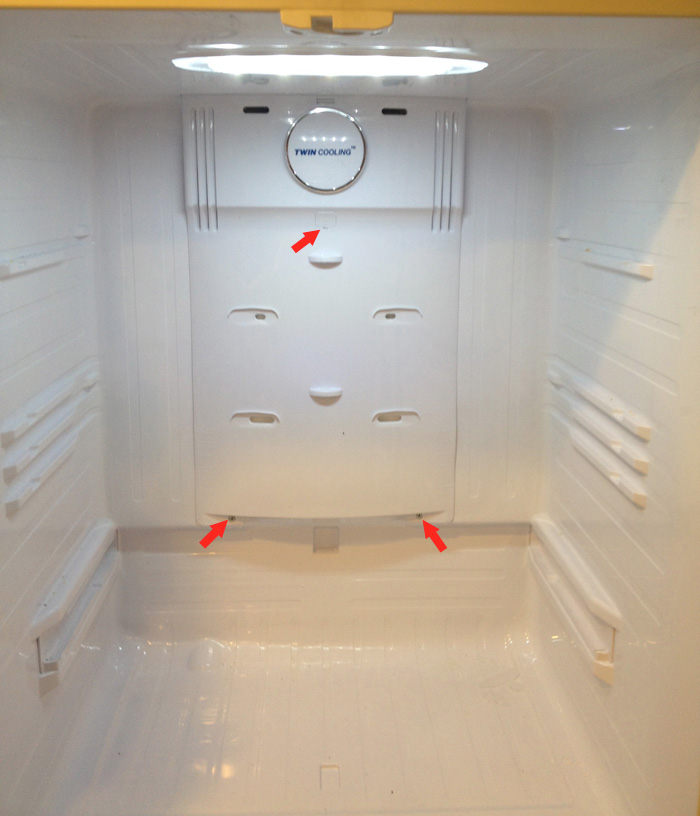
Unscrew the Cover
- Take out both bottom screws
- pop the cover off the middle section
- once the small cover is off then take out the hidden screw that is behind the cover
Helpful Hints For this Step
– The small cover in the middle has hooks on either side. Take a small flathead screwdriver and pry one side out and it will pop out easy.
– Once you remove the small cover if there is ice built up underneath, take a hair dryer and melt the ice until you can access the screw.
Step 3:
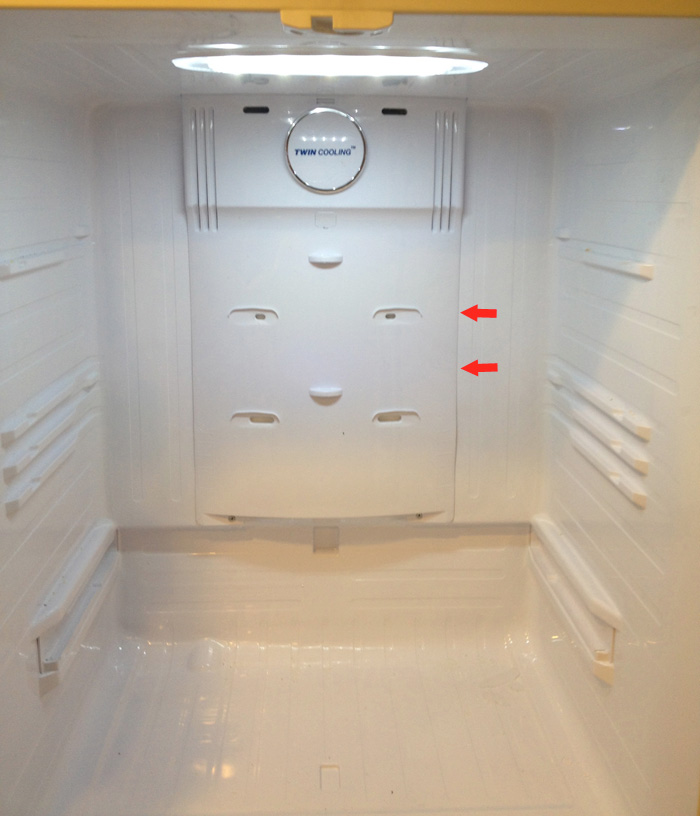
Remove the Cover. This step is the most challenging step of the entire process so take your time and make sure not to break the cover. The best way to remove this is to pull from one side. There are small brakets on each side, once you put pressure on one side the entire cover will bow in the middle and the brackets on the side you are pulling will slide out, and then the entire cover can rotate sideways and easily slide out.
Helpful Hints For This Step
– If you have trouble getting the cover off you can take a flathead screw driver and slide it under one side. From there you can gently pry until the cover slides out.
– If you get very stuck on this step, take a hair dryer and heat up the cover, depending on how much ice has built up ice could be keeping the cover panel locked in place.
Step 4:
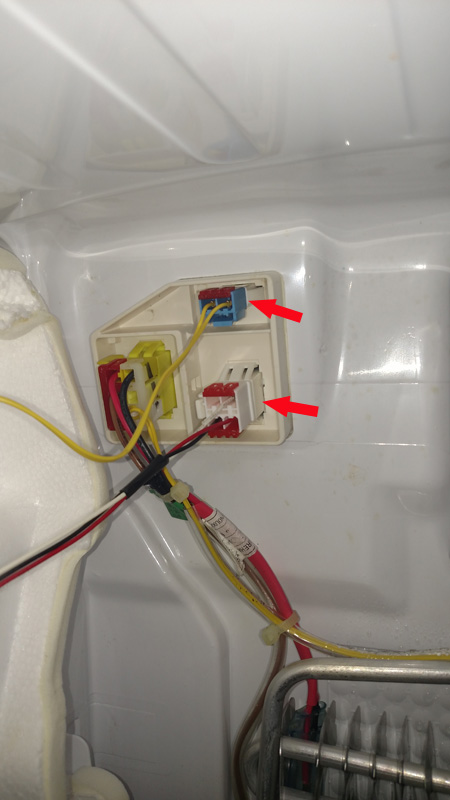
Unplug the evaporator. There will be two wires that you need to unplug, pictured below:
Step 5:
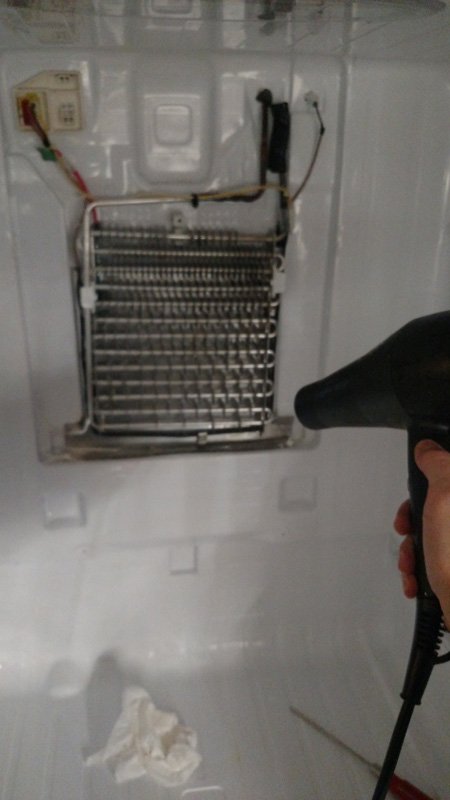
Take the hair dryer and melt all of the ice frozen in the bottom of the metal tray, pictured below:
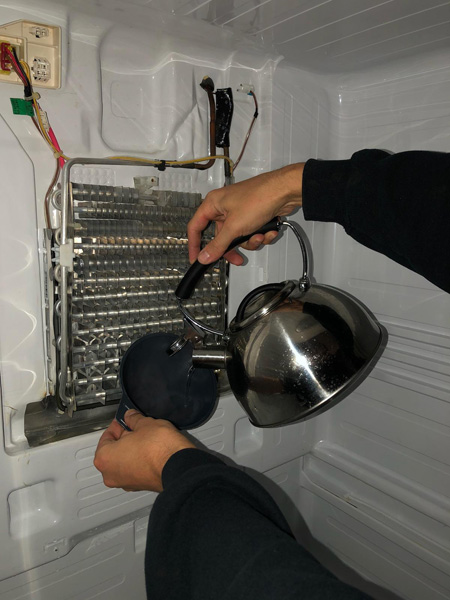
Step 6:
Boil water and melt the remaining ice stuck in the drain hole:
Helpful Hints For This Section
– It took me 5 different pours of boiling water before the ice fully melted. Once the ice melts you will hear water drain down to the pan at the bottom of the fridge. Go ahead and pour a couple more small amounts of boiling water after the ice melts to help clean the line.
– If the ice is really stubborn in the drain hole, put a flat head screw drive and take a hammer and very lightly tap the screw drive. Do not hit it very hard, this is only to try and loosen up the ice a bit.
Step 6:
Reassemble the fridge, plug it back in and then bask in the satisfaction that you just solved a problem with your own two hands and fixed your fridge without paying a single dime to anyone!