These are shorthand notes for setting up Forge & Envoyer
Forge:
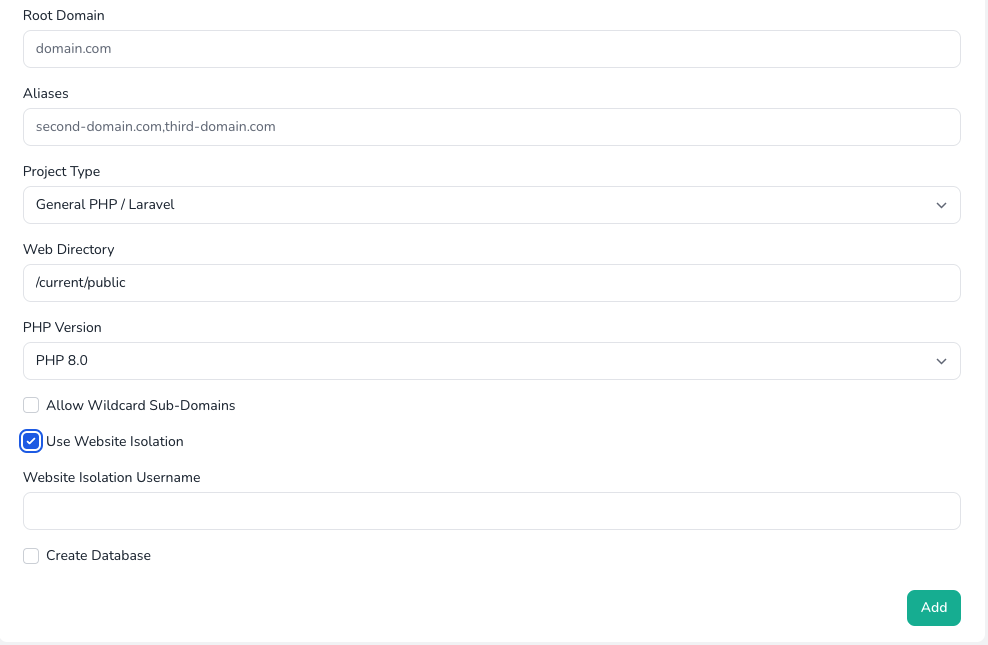
The first thing we need to do is create the account on Forge. Since we are using Envoyer we need to update the root path, we should also select use Isolation and then type in our domain name. The screen should look like this
From there, its time to activate SSL. The domain must be pointed to forge for this to work, so make sure the A record of the domain name is pointing to the forge machine. Click “let’s Encrypt” then type click install.
Now its time to jump over to Envoyer to finish deploying the site:
Envoyer:
- Hit the Add new project button.
- Type Live – Site Name
- Copy username and repo name
- Copy branch name
- Click Save project -> then click into the project
- Click the Server tab, then click Add server
- Type the Name
- Copy public IP address from Forge & Enter
- Connect with port 22
- connect as the isolated username
- Select the PHP version we used on Forge
- Copy the project root path from Forge commands page
- Leave Blank the check box for reload FPM after deployments
- Save server, then copy SSH key from Envoyer and add to forge for the isolated user -> test connection
- Click Manage Environment, copy the .ENV contents into screen and hit save
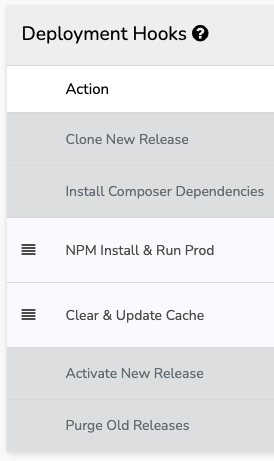
Setup Deployment Hooks for NPM Install & Run Prod, as well as Clear & Update Cache. The code in these files should look like:
cd {{release}}

npm ci
npm run prod


cd {{release}}

php artisan cache:clear
php artisan view:clear
php artisan config:clear

php artisan config:cache
php artisan route:cache
php artisan view:cache
Finally drag/drop the deployment hooks so that they run before the new release is activated, it will look like this